
Every day, countless cutting activities go on worldwide using different saw blades. While these saw blades come in numerous sharpening and dimensions, the circular saw blades seem the most versatile. However, no matter how durable any saw blade could be, the need for maintenance will eventually arise. Often, the major maintenance of the saw blade centers around re-sharpening its teeth. Hence, how and when to perform sharpening becomes extremely important, which this article targets to tackle and clarify.
Table of Contents
- 1. Which saws can sharpen?
- 2. Is It Worth Sharpening Saw Blades?
- 3. How Do I Know If My Saw Blade Is Dull?
- 4. Things to consider before doing saw blade sharpening.
- 5. Step by Step Guide on How to Sharpen Saw Blades
- 6. points to check after sharpening the saw blade
- 7. Methods of saw blade sharpening
- 8. Saw Blade Caring Tips
- Conclusion
Fig. 1: Circular saw blade showing the arbor.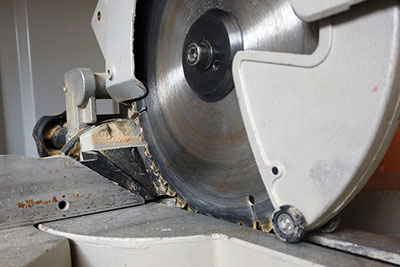
1. Which saws can sharpen?
Following the advent of saw blades, one thing has become clear- the need to sharpen them properly. Despite the various saw blades, the focus here is on the circular saws. Sharpening diamond saw blades, carbide-tipped, or HSS-tipped blades are quite possible. Due to the nature of saw blades manufactured nowadays, it still requires extremely hard files or sharpeners. Saw blade sharpening is all about removing old teeth layers to reveal fresh tips.
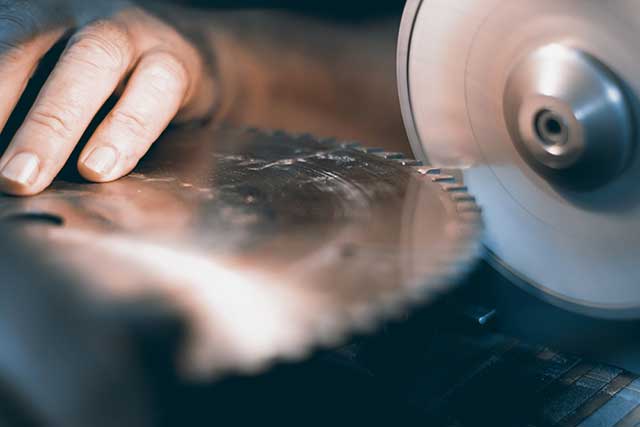
Fig. 2: Circular saw blade sharpening.
2. Is It Worth Sharpening Saw Blades?
In addition to considering whether to sharpen the saw blade, some factors must consider before shaping. Suppose you could easily walk into a store for a replacement, so why do you need to re-sharpen? Well, this will largely edge on your purchasing power and will. Quality circular saw blades can be pricy. The degree of dullness will further inform your decision to replace or re-sharpen.
The truth is, saw blade sharpening always leaves your blade as good as new. After sharpening, you always have yourself a crisp and efficient blade. Generally, large-diameter blades often seem better to sharpen over smaller-diameter blades. Again, the quality of the blade you intend to sharpen will go a long way toward informing your decision. Saw blade sharpening guarantees durability and maximum utility over time.
In essence, once your saw blades have served a couple of years, it is safe to say a replacement is imminent.
3. How Do I Know If My Saw Blade Is Dull?
Firstly, one of the major determinants that you have a dull saw blade is the nature of the cut it gives. Once your saw blade begins to give a rough and inaccurate cut, you need to consider sharpening. A dull saw blade will always produce poor-quality cuts and give your project a bad outcome. Secondly, a dull blade causes overworking of the motor as it tends to do more work without corresponding results. You can effectively diagnose this as sharp blades consume less power, and you can observe the change in the sound. Thirdly, frequent tearing and chipping of the material cut indicate that your blade is dull.
Another thing is that saw blade sharpening becomes important when the blade cannot run itself through the material easily. When this happens, you observe burn marks around the cut you make. Finally, the difficulty of the saw blade following the marked-out cut line indicates that dullness has set in.
Kindly note that your decision to sharpen your blade is based on your discretion, as no specific date is attached. What you use your saw blade for and how much work it does determines how often it needs sharpening.
4. Things to consider before doing saw blade sharpening.
As mentioned in previous sections of this article, many saw blades require some techniques to sharpen. Before carrying out saw blade sharpening, you must ensure that you consider factors such as:
- Does your saw blade deserve sharpening? This question is multifaceted, with different views and angles. Usually, a saw blade worth sharpening is very high quality and often costly enough to be sharpened over replacement. Therefore, investing your money to buy a good saw blade is the beginning of it all. On the other hand, poor quality or weak saws do not need sharpening. In this case, we recommend completely replaced.
- If you feel you can carry out saw blade sharpening yourself, you must invest in the required tools. A saw blade sharpener, a diamond file such as tools, and even technical knowledge can get the job done correctly.
- Before sharpening, you should also consider the finished saw blade tip type.
- Carbide-tipped saw professionals better sharpen blades than with a DIY approach.
- Ensure your proximity to professional grinding saw shops.
5. Step by Step Guide on How to Sharpen Saw Blades
The assumption here is that this is a DIY (do-it-yourself) approach. Below are the steps to follow:
Remove the Blade
Never attempt to carry out saw blade sharpening without dismounting off the arbor. It can be disastrous and dangerous, especially if the switch can mistakenly go on. You must remove the saw blade for sharpening to take place. You can remove the bolt holding the blade off the arbor with a wrench or spanner.
Secure the Blade
With a simple vice grip, you can safely hold down your saw blade while keeping the teeth upwards. However, you must avoid overtightening the vice so as not to warp the saw blade.
Make Marks
This step primarily helps to avoid over-sharpening, as this will affect the tooth thickness negatively. Make a mark on the blade in the beginning, which will serve as the start/ endpoint when sharpening.
Consider the Bevels
The bevel is a part that gives the saw blade a peculiar cutting pattern. Just ensure that you take note of the angle and maintain it as much as you can during sharpening. Also, maintain the bevel angle by positioning your file in that manner when stroking.
Turn the Blade
Similarly, just as you have done on one side of the saw blade, do the same on the other. Make marks also and repeat the other processes chronologically.
File the Tips
After filing the angle, the tip of the tooth is next, and you need not apply much pressure or many strokes. Please keep it simple while running the file back and forth through the blade tips.
Install the Blade
Finally, once the saw blade sharpening does, take the saw blade out of the vice grip. Mount on the saw blade arbor, bolt in place, and enjoy your new blade. Once you are through sharpening, unlock the blade of the vice grip and return it to the saw. Your blade is sharp, and you can enjoy using it for precise cuts.
Fig. 3: saw blade teeth.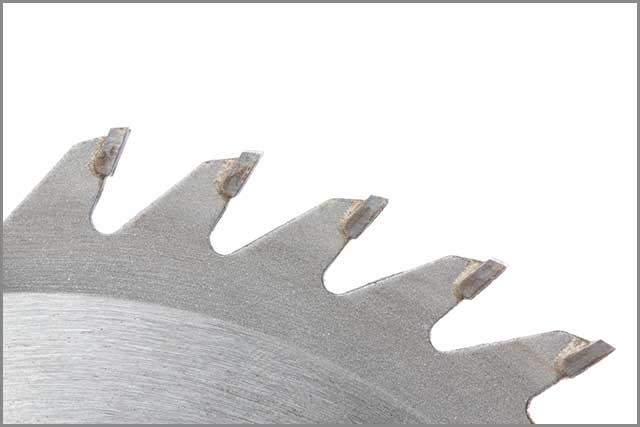
6. points to check after sharpening the saw blade
Checking for precision and accuracy after sharpening matters a lot, too; here are 5 points to look out for:
Edge quality and point sharpness (each tooth visually certified under a 30x magnifier)
- Concentricity (within .002)
- Plate runout(within .005)
- Tooth runout (within .005)
- Tolerance of the various saw tooth geometry.
7. Methods of saw blade sharpening
Nowadays, you can choose to carry out saw blade sharpening via two broad methods, as discussed below:
1. Manual/ Semi-Automated Filing:
This involves using a hand file or a circular diamond saw blade to sharpen the tooth. Knowing fully well that a diamond saw blade is hard than the popular carbide-tipped saw blade. Keep the angle of the file against the tooth at 20 degrees per stroke.
2. CNC Machine Filing:
Over the years, man has advanced the approach to saw blade sharpening. The invention of CNC has made this easier than ever. CNC machines eliminate human labor and make sharpening faster and more accurate. CNC machines seamlessly grind both sides of the blades at the required angle, all in one pass. The input parameters required are cutting angle, blade diameter, and blade.
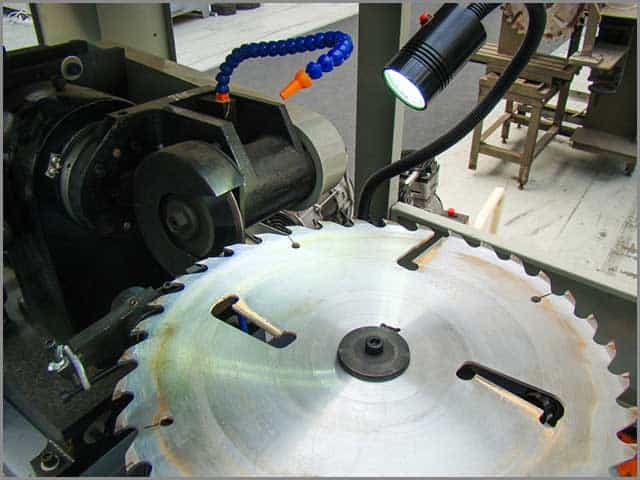
Fig. 4: Ongoing automatic saw blade sharpening process.
8. Saw Blade Caring Tips
- Keep the blade in a Dry Area: Keep it dry and away from moisture.
- Use the Blade for The Right Task: Do not misuse the blade to avoid accidents.
- Cool the Blade: When not in use, keep the blade well aerated.
- Hang the Blade Using the Center Hole
- Clean Blade Using Solvent and Nylon Brush: This prevents corrosion and improves longevity.
Fig 5: Saw blade hung on the center hole.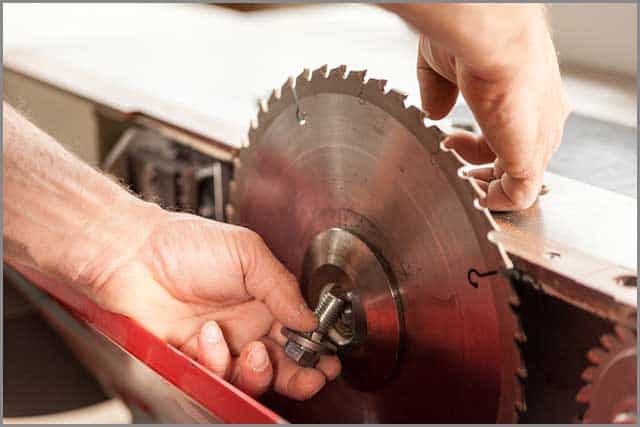
Conclusion
You are good to go when you follow all the key guidelines highlighted above. However, should you require further guidelines and assistance, do well to see this video. Contact and shop with us at NCCuttingtools for all your cutting tools, need, and concerns.
