
Pads are integral parts of diamond tools, which makes pad cleaning an essential process. Not only are they useful when polishing diamonds, but they are equally beneficial during marble, concrete, and granite polishing. However, despite their essential uses, a lot of handypersons and diamond manufacturers lack the basic knowledge of keeping the pad clean.
Thus, this article will address everything you should know about pad cleaning during and after polishing.
Also, we will examine various methods of cleaning polishing pads and how often you need to do it.
Table of Contents
- 1. What are Polishing Pads?
- 2. Why Polishing pad cleaning is important during and after polishing
- 3. Common Types of Polishing Pads
- 4. What You Should know about Pad Cleaning During and After Polishing
- 5. How to Clean Pads During Polishing Using Plastic Bristle Brush
- Step 1: Stop polishing when you notice complete saturation of the pads
- Step 2: Turn the polisher over to face up
- Step 3: Apply the plastic bristle brush against the polishing pads
- Step 4: Cover all the pads area
- How to Clean Pads During Polishing Using a Towel
- Step 1: Get a Multi-Purpose Microfiber Towel
- Step 2: Spray the pads with ONR QD
- Step 3: Press the Microfiber Towel Against the Pad
- 6. Cleaning Pads After Polishing
- 7. Drying Your Polishing Pads After Cleaning
- 8. FAQ about polishing pad cleaning
- Recap and Final Thought
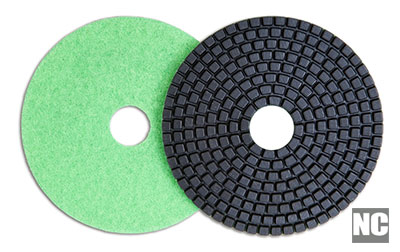
Figure 1: Polishing pads for diamond, stone, granite, and other masonry work.
1. What are Polishing Pads?
Polishing pads, as the name implies, are tools you can use to apply polish to a surface during different applications, including diamond polishing, through mechanical or manual methods. Polishing pads come in different materials, shapes, colors, and sizes, depending on what you want to use them for. Some variants of polishing pads include foams, wool, microfiber, and PE fiber polishing pads.
2. Why Polishing pad cleaning is important during and after polishing
Unless you see a genuine reason to keep polishing pads clean, you might struggle to take care of it as long as you feel it handles the task. However, there are several benefits you will enjoy if you cultivate the habit of cleaning your pad during and after polishing.
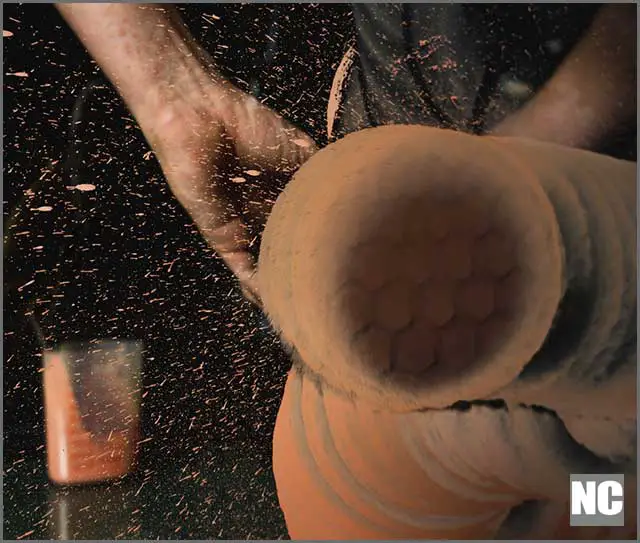
Figure 2: Close-up on the polishing pad in use
Here are the top three reasons why you should clean your pad during and after polishing:
1. Loss of Corrective Ability
We use pads on our various tools primarily to keep the surfaces glowing. Due to the materials we employ in manufacturing polishing pads, they will accumulate oil, paint, and abrasive from diamond and other materials over time. Also, its fluffy nature will help it attract particles from the materials after use. This continuous accumulation of various components makes pads lose their corrective ability. Thus, they would stop serving their original purposes.
2. Smearing of materials
A pad with its pore accumulating polish residues will become saturated after a while. The splatter oozing from the spore will smear the materials we are polishing, thus rendering the pad inefficient. At this point, cleaning the pad is inevitable as it can mar the outcome of the polishing.
3. Improved Durability
Making an effort to clean your pad will enhance its durability and extend its life. Since these pads have easily damaged materials as their component, leaving them uncleaned makes them sticky rendering them useless quickly.
4. Increased Efficiency and Productivity
Working with a clean pad will hasten the time you take to complete a polishing project, as it is easier to work with a clean pad than a soaked and dirty one. Also, you will be more satisfied with your overall polishing outcome when you use a clean pad instead of a messy one.
3. Common Types of Polishing Pads
To better understand the essence of pad cleaning during and after polishing, it’s essential to analyze the different types of polishing pads. Here, we have provided the common types of pads, depending on the components.
Foam Polishing Pad
Due to several factors, such as its low cost, availability, and ease of cleaning, the foam pad remains the most common polishing pad. It comes in various forms, colors, shapes, and sizes. Its cell type, the thickness of the cell- walls, and size all affect its ability to absorb materials. All these account for the pad’s stiffness and affect its absorption and the friction it requires to move it around when polishing. Cleaning a foam pad is very easy, and you can reuse it relatively many times.
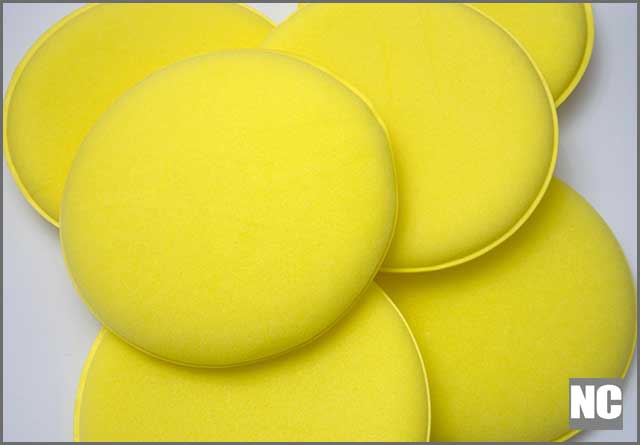
Figure 3: Round shape yellow foam polishing pad
PE Fiber Polishing Pads
The synthetic strand of fibers is the primary constituent of this polishing pad. As such, its surface is harder, which might not make it ideal for paintwork. However, it improves polishing outcomes when using harder surfaces such as diamonds, metal, and glass. It works best with special polishing agents. Also, it’s easy to clean and offers high durability and extended reuse.
Wool polishing pads
These pads have synthetic or natural wool fibers as the primary materials we manufacture. The fiber follows a specific processing method that will determine its strength and the type of its applications. Wool polishing pads are tougher than foam pads and offer better cutting effects. They come in many shapes and sizes as well. However, they need special cleaning and general maintenance to keep them clean.
Microfiber polishing pads
Generally, microfiber polishing pads offer a lower absorption rate for materials and residues when compared with others. On the flip side, they allow more friction during polishing to get the best result. Although microfiber pads often come from synthetic materials, sometimes we use natural materials in producing them.
4. What You Should know about Pad Cleaning During and After Polishing
Pads require cleaning during polishing and after applying the polish. However, note that the methods and the materials vary depending on the cleaning stage. You can use tools such as a plastic bristle brush and towel to clean the pad during polishing.
However, cleaning the pad after polishing requires specialized pad-cleaning solutions. The procedures for cleaning both during and after polishing vary. As such, you will need to follow different methods with different tools, as we have highlighted below:
Cleaning Pads During Polishing Using a Plastic Bristle brush
Whether you choose to clean the pads or not during polishing will determine the result you will get. However, it would be best if you cleaned your pads to ensure a quality polishing outcome. Plastic brush brittle is highly effective in cleaning pads. They work perfectly with all types of polishing pads. That is foam, wool, PE fiber, and microfiber.
5. How to Clean Pads During Polishing Using Plastic Bristle Brush
These are the step-by-step methods of pad cleaning during polishing.
Step 1: Stop polishing when you notice complete saturation of the pads
As explained earlier, pads will naturally absorb polishing materials over time. When you discover that the volume of polish on the pads isis too much to get the desired polishing result, you will need to stop the polishing process first.
Step 2: Turn the polisher over to face up
Irrespective of the type of polisher you use, whether manual or electric, you must flip it over to face up before cleaning. It will allow you to get access to all areas of the polisher. Also, it gives you even cleaning and makes the process more effective. However, ensure that you are a few meters away from the material you are polishing to prevent dust emanating from the pad from settling on the surface you have already polished.
Step 3: Apply the plastic bristle brush against the polishing pads
After turning your electric or manual polisher on its back, press the plastic bristle brush against the pad on the polisher. Apply little pressure as you carefully press the brush while the polisher spins. Doing this will ensure you don’t destroy the pad’s surface, especially if you apply it to soft surfaces like foam. Exerting excess pressure will damage the pad. Alternatively, gently detach the pad from the polishing pad and scrub. Note that some electric polishers will stop moving at the slightest brush pressing against them. Thus, those will stop spinning while cleaning the pads.
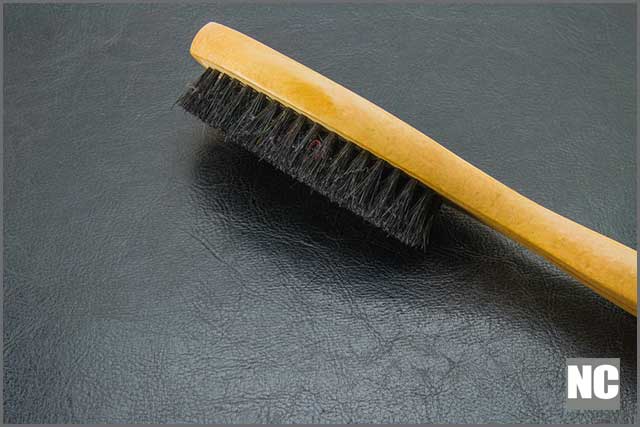
Figure 4: Plastic bristle brush for pad cleaning during and after polishing
Step 4: Cover all the pads area
When using a plastic bristle brush to clean pads during polishing, you must ensure that the brush covers all the pad areas. It includes the outer rim of the spinning pad and the center part. You will see a change as the pad returns to its original color. The cleaning usually lasts 1 – 2 minutes using this method.
How to Clean Pads During Polishing Using a Towel
Besides using a brush, towels also work perfectly for cleaning pads during polishing. Here are the steps you should follow to get the best result:
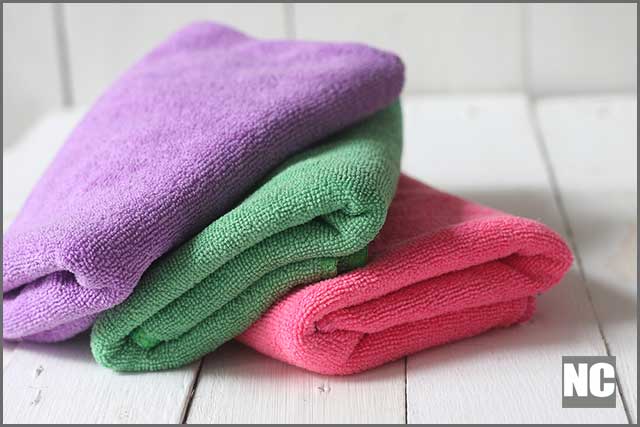
Figure 5: Fiber towel in three different colors
Step 1: Get a Multi-Purpose Microfiber Towel
These towels contain ONR in a quick detailer ratio. You can shop them at the local store or place an order online.
Step 2: Spray the pads with ONR QD
On completing a section during polishing, apply OND QD to some areas of the pad and allow it to sink for seconds. The ONR QD solution contains elements that soften the materials on the pad’s surface.
Step 3: Press the Microfiber Towel Against the Pad
Now, pick up the soaked towel, and press slightly against the pad. You must be careful to apply minimum pressure so that you don’t damage the pad. Like the brush method, you can clean when the polisher is spinning. Also, you could detach the pad and hold it with your hands. You can equally use a working table for support to get a better cleaning outcome.
Precaution: Ensure that the towel is not too tight on the pad as it could get caught by the spinning badly, resulting in damage. Also, keep pads away from the materials you’re polishing.
6. Cleaning Pads After Polishing
We usually recommend the following process for deep cleaning of pads after polishing.
- Disconnect the polishing tool from the power source
2. Detach the pad with polishing tools. You can follow the user manual to see how to do that.
3. Apply the pad cleaning solution to the pad’s entire surface. The goal is to derive a wet, but not soaked, sure, face. We recommend applying the spray in a sink away from your kitchen. Check local stores or online for different cleaning solutions.
4. Allow the cleaning solution to settle in the pads for 2-5 minutes, depending on the concentration of the polish on the pad. You might want to use a nose guard to prevent the pungent smell of the solution from irritating you.
5. Press the solution into the pad for 15-30 seconds while using your thumb to massage the pad.
6. Place the pad under a running faucet and allow water to penetrate for up to one minute. When dust comes out of the pad, squeeze it gently.
7. Repeat step 6 until you are sure that the pad is free of dirt and other polishing materials. Evidence to know if it’s clean enough is when the pad returned to its original color when you got it.
7. Drying Your Polishing Pads After Cleaning
There are two methods of drying and polishing pads after cleaning. The first method involves air-drying the pad. To do this, lay the pad with the polishing side down to prevent water from sipping to the glue that attaches the pad to the polisher backing. Allow the pad to sit for 12-24 hours, depending on the polishing pad used. You can squeeze out excess water with a microfiber towel before air drying to remove moisture and hasten the drying process.
The second method involves using a machine or a dryer to remove the moisture. Although this is a quicker method of drying pads, you might experience some pad shrinkage, and too much heat might damage the pad. Thus, you must set the dryer to very low heat and the rotation speed at medium for 20-30 seconds.
After the pad is drying enough, reattach it to the polisher and continue using it.
8. FAQ about polishing pad cleaning
These are some of the popular questions our readers ask us about pad cleaning during and after polishing:
1. Can you reuse polishing pads?
Yes, you can reuse polishing pads up to 3-4 times if you clean them after each use. Follow the methods highlighted above for pad cleaning during and after polishing.
2. How do you clean microfiber polishing pads?
Cleaning microfiber polishing pads can use either of the two methods we have highlighted above: the use of a plastic bristle brush or a microfiber towel. Either of the two will do an excellent job if you follow our stated procedures.
3. What is the difference between buffing and polishing pads?
Both polishing and buffing involve smoothening a workpiece’s surface using an abrasive item like a pad. While buffing is less aggressive, polishing is a stringent process. However, a buffing pad differs in that it creates a smoother and brighter finish. Thus, a buffing pad is softer than a polishing pad.
4. Which method is the best for cleaning polishing pads?
It’s hard to choose the better method of cleaning pads between using a plastic bristle brush and towel. It largely depends on the polishing pad you use and the concentration of polish and dirt on the pad.
Recap and Final Thought
Now that you know everything you should know about pad cleaning during and after polishing, you can rest assured of improving your productivity and extending the lifespan of your pads. Also, you will have better finishes during polishing. If you are looking to buy bulk polishing pads and other diamond tools as a supplier or distributor, NC Cutting Tools is your one-stop shop for all cutting and grinding tools for diamonds. We also specialize in manufacturing metal fiber, and PDC bits with over 1000 products and OEM services. Feel free to contact us for diamond tools. We deliver worldwide.