
The components of both ceramic and Porcelain tile have changed over the years, with manufacturers mixing various materials to improve the tile’s hardness and service life.
While these material mixtures are an advantage from the standpoint of wear, it automatically becomes a disadvantage when you need to drill.
For this reason, the traditional spearhead carbide-tipped drill bit is no longer the best option for drilling through such tile. Now, most users have the ultimate choice of using a diamond tile drill bit.
This article addresses five tips for using the diamond tile drill bit.
Table of Contents
- 1. Recommended Drill Pressure
- 2. Using a Pilot Drill
- 3. Drill Bit Lubrication
- 4. Diamond Tile Bit Speed
- 5. Using the Bit with a Template
- Conclusion
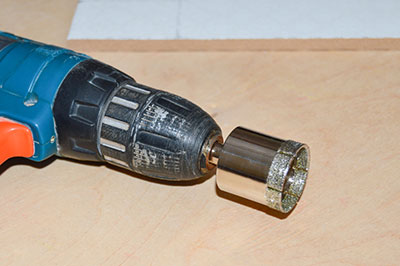
Figure 1: Diamond Tile Drill Bit
1. Recommended Drill Pressure
Contrary to a typical drill bit, your drill’s increasing pressure leads to faster drilling and lesser heat build-up. The diamond tile drill bit is very different because an increased drill pressure will lead to increased friction.
This friction will eventually cause a higher heat build-up on the drill bit, which will cause the bit to burn out faster.
More often than not, the pressure when using the diamond tile drill bit is mostly within a light to medium pressure. Forcing the drill pressure to go higher than this will not necessarily lead to a faster cutting.
The drill will overheat and burn out faster. Beyond just the drill bit, built-up heat can also spread to the tile you are cutting and cause heat fractures.
Some indicators tell you when the drill pressure is too high. A very popular one is when the bit develops coloration around the tip, which may be yellow, brown, blue, and sometimes black.
Sometimes you may not have to drill through a tile completely. At such points, it is essential to reduce the pressure of the drill as you approach the endpoint. Failure to do this can lead to the tile fracturing at the back of the tile.
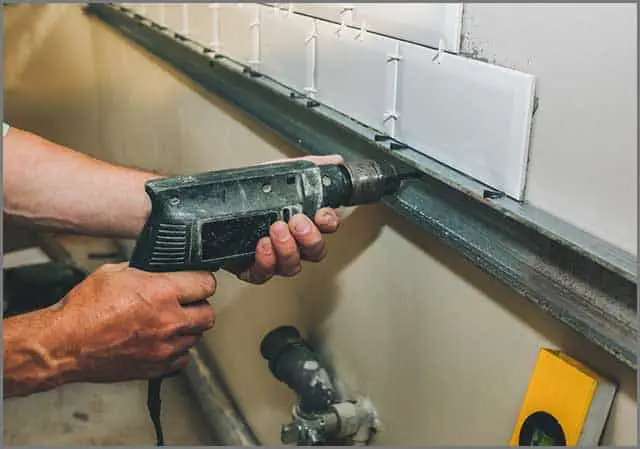
Figure 2: Man applying pressure on tile cutting
2. Using a Pilot Drill
In case you don’t know, drilling tiles can be tricky due to the tile’s structural composition. Recently, manufacturers have designed the tile to have a hard, glazed surface. This surface provides a form of protection to the tile from impact damage that may lead to fracture.
More so, because of the purposes of today’s tiles, they are smooth and decorative. However, this smoothness causes the drill bit to slip and jump, also known popularly among many users as “walking.”
This slippage is unsuitable for the tile as it will cause scratches that disfigure it. This slipping on the surface has caused manufacturers to develop the pilot drill for drilling a pilot hole.
However, using the pilot with your diamond tile drill bit has a few drawbacks below:
- Increased cost because the diamond tile drill bit already comes at a steep price. Including the pilot will only cause the price of the drill bit to go higher.
- Using the pilot bit can sometimes cause you to cut slower.
- You will always find that the pilot bit wears out faster than the main diamond tile drill bit more often than not.
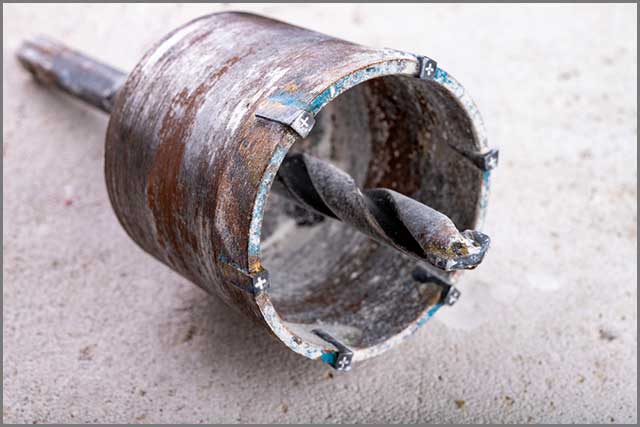
Figure 3: Using a Pilot Tile Bit
3. Drill Bit Lubrication
Lubricating is a crucial aspect of drilling and much more when drilling with a diamond tile drill bit. Well, it will interest you to know that water has proven to be a better option for lubricating than oil.
When drilling tiles, it is essential always to keep the point of contact of the drill and the tile wet. This lubrication is vital because if your drill bit gets warm or even hot, it strongly indicates little or no lubrication.
With a hard material like the tile, you will need a lot of lube, and when you are drilling with a diamond tile bit, you must get enough water to the cutting edge.
It is essential to know that there are different techniques to lubricate your diamond tile drill bit, namely:
Hose Method:
Operators use this technique to use a small hose that runs from storage to the tile surface. The flow is slow but continuous on the surface to ensure lubrication.
Clay Dam:
This technique is somewhat complicated because you must create a tunnel-shaped structure around the drill hole. Operators mostly use clay to build this structure, which is very effective in supplying the water flow into the contact point of the bit and tile.
Pan Drilling:
This type of technique is popular among users of smaller-sized tiles. They carry out this technique by submerging the tile in a water-filled pan. The water covers the tile surface and the hole on the tip of the diamond tile drill bit.
Spray Bottle:
If you are looking to drill through a tile vertically placed (on the wall mostly), this technique is the best lubrication you can apply. The sprayed water will always keep the drill bit from burning.
Pumping technique: this is presumably the best method of lubricating diamond tile drills because of its constant or periodic water supply to the bit’s cutting edge.
The pumping technique is useful because it supplies water directly to the cutting tip of the bit. This technique increases the service life of the diamond tile drill bit significantly.
4. Diamond Tile Bit Speed
But speed has always been an essential factor to consider in any drill, and the same goes for the diamond tile drill bit.
When cutting materials like ceramic tiles and other harder and more abrasive materials, your drill bit speed must be slower. Because you can have a bigger bit diameter, you must compensate for that size with a lower rpm.
In producing drill bits, manufacturers give recommended drill speeds for each material you might want to cut.
An overshoot of this recommended drill speed will invariably lead to you burning your diamond tile drill bits faster.
It is also important to note that drill speed is in combination with both lubrication and drill pressure. As you imagine, a faster drill speed will give a quicker cut.
However, it will also increase the friction and built-up heat. This heat can eventually lead to fracturing the tile or even damaging the drill.
Again, you must always keep your drill bit warm, and if you notice any coloration on your bit, it is a clear sign of overheating.
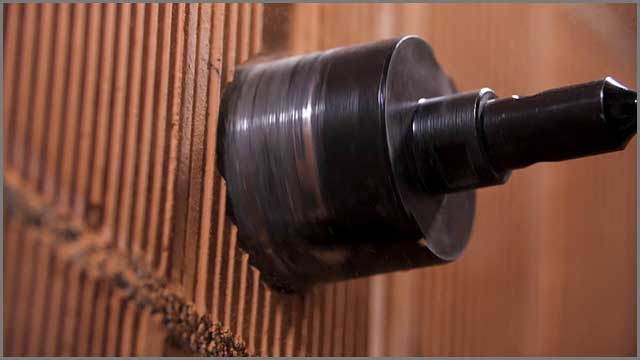
Figure 4: Tile Drill Bit a Light Speed
5. Using the Bit with a Template
Another alternative to reducing the slippage of the diamond tile drill bit is to use a template. A template is a makeshift tool you can make by drilling a pilot hole in plastic or wood the size of a diamond tile drill bit.
These days you will mostly find ready-made templates of 1/8″ plastic and 1/8″ pressed wood. It is worth noting that if you want to carry out repetitive drilling, you should opt for a plastic template.
The major reason is its increased level of lubricity since you can add water almost immediately.
Most operators use the template by placing it off the drilled material and setting the template so that the pilot hole is above the target hole area. The template helps to hold the diamond tile drill bit in place when starting a groove.
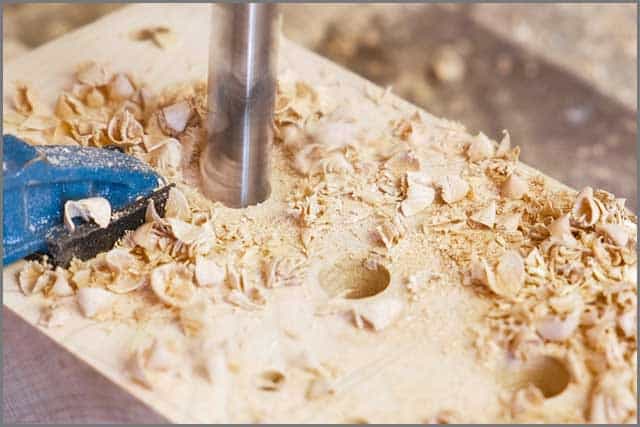
Figure 5: Drilling a Cutting Template
Conclusion
The diamond tile drill bit is a cutting tool popular among professional, skilled, and unskilled users.
Famous for its theater of applications in precise finish and smooth cutting, the diamond tile drill bit is a must-have in your collection. This article outlays the different tips you will find useful for more efficient and faster cutting.
In conclusion, therefore, as you continue to look out for helpful tips to help maximize the use of your diamond tile drill bit, look no further. NCCuttingtools has got you covered.
Click for a video with up-to-date information about using the diamond tile drill bit.