
About Edge Joint, Many different techniques and skills are involved in the centuries-old art of woodworking.
One popular method is edge jointing, crucial for making solid and flawless joins between two wooden pieces.
The technique entails joining two pieces of wood along their edges to construct a continuous and long surface.
It is common in woodworking projects that demand accurate and robust joints, like cabinetry and furniture assembly.
This article explores various techniques for making an edge joint to help you create high-quality, long-lasting woodworking items.
Table of Contents
- Forming the Joint with a Machine
- Forming the Joint by Hand
- Mix and Match the Hand and Power Methods
- Conclusion
Forming the Joint with a Machine
If you’ve opted to employ a machine for edge jointing, the operation becomes more efficient and exact. Using a machine ensures a robust and seamless junction by providing a precise and consistent edge.
However, for fresh carpentry individuals requiring more power tools experience, utilizing machinery can be challenging.
This section outlines the procedures for creating machine-formed edge joints, giving you the expertise and assurance for consistently high-quality joints.
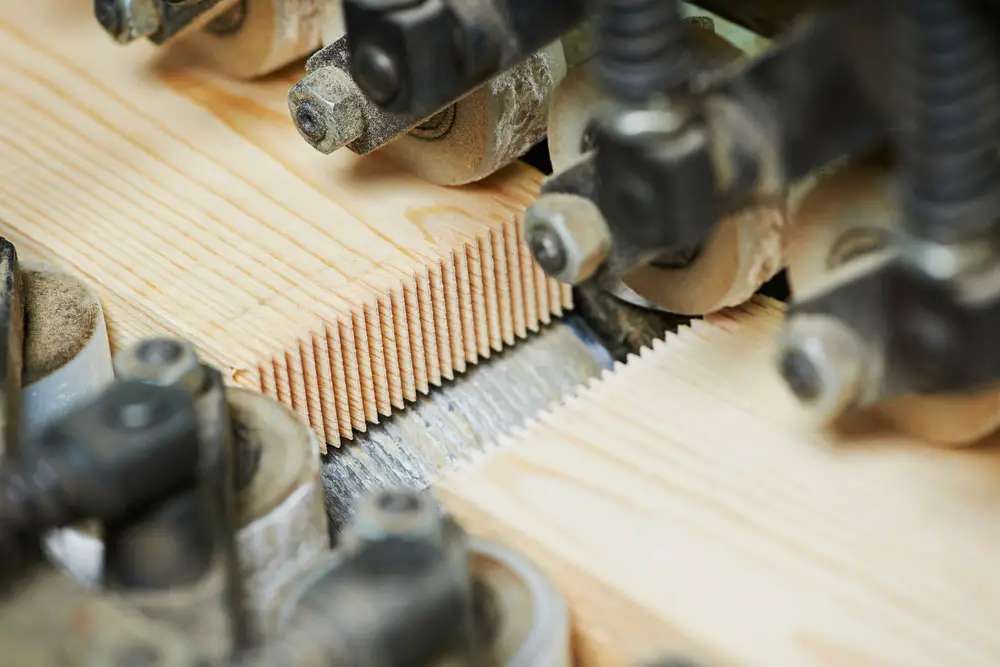
Joints by machining
Step 1: Inspecting the jointer tables’ alignment
Adjust the infeed table until its top surface is about ⅛ inches below the outfeed table. Use a long straightedge across both tables to confirm a constant ⅛ inches gap between them.
Consult the operating manual for details on how to resolve any errors.
Step 2: Creating a reference plane
Ensure at least one side of the joining board is flat. You can flatten one side using your jointer if its cutter head is wide enough.
You may also use your winding sticks and hand planes instead.
Consider ripping wide boards into half for seamless straightening and surfacing on the jointer and then rejoin them later.
Step 3: Adjust the depth of cut
Start with a relatively shallow cut of 1/32 inches if the edge is straight. If the board is seriously crooked, go up to 1/8 inch.
Step 4: Concave edge straightening
Start with the concave edge and make a few passes from the edge at either end of the board.
To gauge your progress, frequently sight the edge. Join the edge along its entire length when it is almost straight.
Step 5: Join the entire length
Put your feet neatly on the left back of the infeed table for the jointer. Place your left hand on the board’s front top to keep the lead end flat on the infeed table.
Let your left-hand fingers press against the board so the fence is firmly forced against the face on the other side.
Slide the board’s bottom edge across the cutter head and along the infeed table at a steady, moderate speed.
Distribute more pressure downwards from the back to the front as you move along the length of the board.
Step 6: Validate your work and Finishing
Use a straightedge to inspect the jointed edge and a square to ensure a perfect 90° angle with the neighboring face. Verify that the jointed edge covers the entire edge’s width and length.
Your panel is ready for glue-up if the two boards’ jointed edges are in the same plane with no gaps.
Once the glue has dried, consider smoothing out the joint by removing any residual with a hand plane or sandpaper.
Forming the Joint by Hand
Hand-edge jointing is a traditional method that woodworkers have employed for ages.
Although it may take longer than machinery, it gives you more control and accuracy over the joint.
It’s also a beneficial skill to learn since it can be applied when a machine is neither practical nor available.
In this section, we’ll go through building an edge joint manually, the equipment needed, and some vital pointers.
Joining using hands
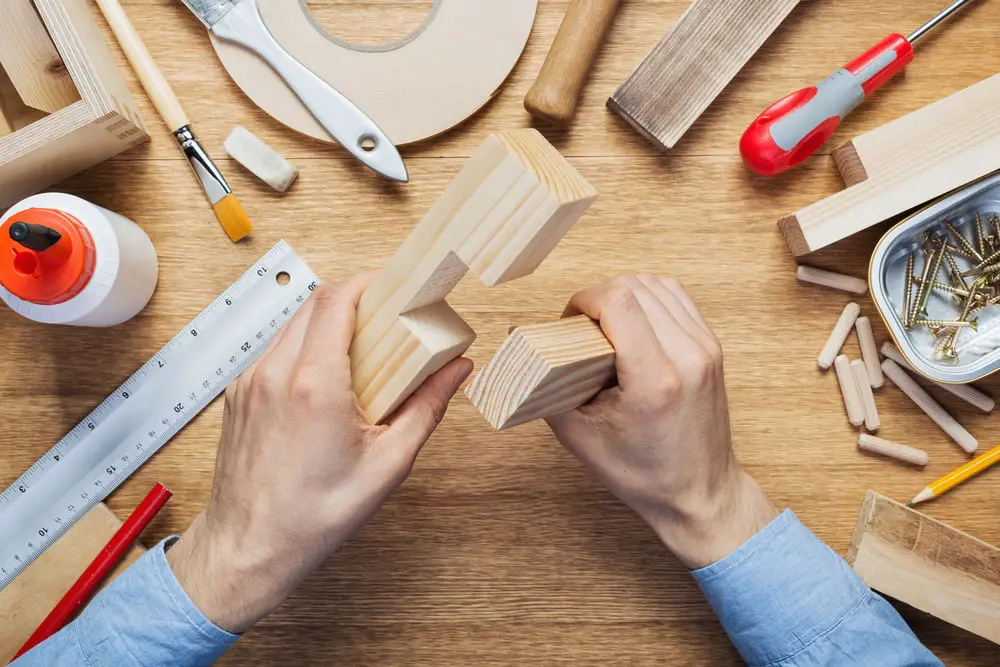
Step 1: Choose your tools
This method requires a hand plane, clamps, a marking gauge, a saw, and a chisel, among other hand equipment.
Consider a jointing plane with a sole longer than 20 inches dealing with long wood.
A jack plane with a sole between 12 and 15 inches may be appropriate for working with shorter stock.
Step 2: Prepare your boards
Verify that the two boards you will be gluing have straight and square edges. Use a hand plane or a saw to correct the edges if needed.
Draw a line down the length of every board where the joint will be formed using a marking gauge. Ensure the line is a few millimeters from the board’s edge to leave space for planning.
Step 3: Cutting and planing the joint
Cut along the drawn line using a saw, removing the unnecessary parts from each board. Ensure the saw blade is perpendicular to the board’s surface to guarantee a straight cut.
Create a level, straight joint by trueing up the edges of the two boards using a hand plane. Each board should first have its end grain planed before its edges.
Take your time and take care not to remove too much material. Continue applying gentle, steady strokes until the edge is square and straight.
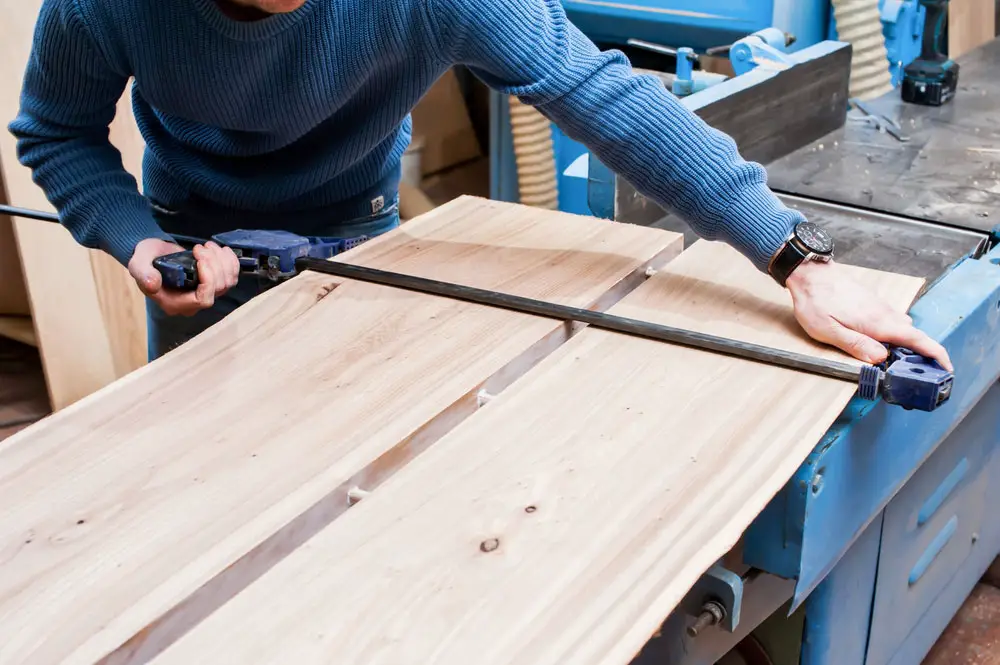
Step 4: Testing and finishing the joint
To test the joint’s fit, combine the two boards. There should be no gaps between the two boards, and the joint should be flat and flush.
After ensuring both edges are parallel and straight, add wood glue and clamp the boards together.
Check to make sure the joint is tight and flush the entire time. Using a jack plane or sandpaper, scrape out any extra glue and clean the joint after the adhesive has dried.
Mix and Match the Hand and Power Methods
As a carpenter, combining manual and power methods when constructing an edge joint can increase flexibility and workshop productivity.
Combining the advantages of both techniques can make strong, reliable, and effective edge joints.
This section discusses forming an edge joint using hand and power methods, the necessary tools, and joint-building advice.
Making a joint
- To start, rapidly straighten an uneven square wood using a machine jointer. Press the board against the jointer’s fence to define a stable reference surface.
- After connecting the stock with a machine jointer, use a plane with a wood fence to create a smooth and level surface. Ensure the fence is attached to a relatively light transitional jointer.
- Then move the working surface across the plane’s undersurface to reach the iron’s cutting edge.
- Avoid pressing the work up against the fence when using the joint plane and a fence. Instead, use the fence to set up a trustworthy reference surface for the hand plane.
- Repeat steps 1 and 2 until the board is smooth, square, and straight.
- While choosing the kind of jointer to employ, consider the jointer’s balance with a fence. The jointer with a fence may be more convenient than an unfenced jointing plane because it is relatively light.
- Consider the outcomes and select the approach that best suits your requirements.
- Consider employing the jointer-with-a-fence as a combination approach if achieving satisfactory results with a jointing plane is challenging.
Conclusion
Creating an edge join is a crucial woodworking skill that enables two boards to attach flawlessly along their edges. Edge joints come in various forms, each having unique qualities and functions.
The secret to creating a solid and accurate edge joint is paying close attention to the intricacies of the joint.
Adhering to these procedures outlined in this article can help you develop sturdy, functional, and aesthetically pleasing edge joints.