
The table saw crosscut sled is every woodworker’s dream. This dream is not just because of the speed associated with getting things done but also the precision. There are a lot of technical ways you can go about making a crosscut table saw sled.
This article presents all you need to know about building a crosscut sled for the table saw. It will present several factors you must consider and the steps you must follow.
So, as we move through each section, open your mind to making a practical DIY crosscut sled.
Table of Contents
- Section 2: About table saw crosscut sled.
- Section 3: Why do we need the table saw crosscut sled?
- Section 4: How to build a crosscut sled for your table saw?
- Section 5: Can I make a table saw sled for 45-degree miter cuts?
- Conclusion
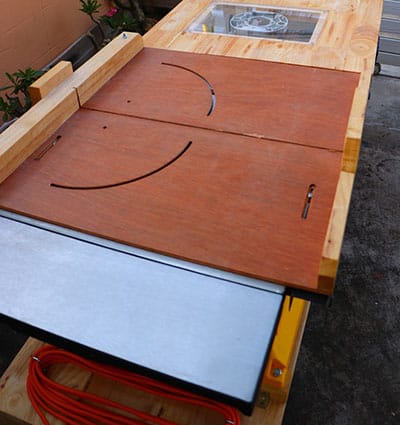
A typical crosscut sled
Section 2: About table saw crosscut sled.
2.1 What is a crosscut sled?
A crosscut sled is a device you can use to make crosscuts. However, there are different intricacies in creating a crosscut sled.
Crosscut sleds are not just a modern time tool, as different generations have different applications and modifications of the tool.
The different variations of the crosscut sled available today require sufficient insight before making a choice.
2.2 What can the table saw crosscut sled do?
As a modern woodworking tool, the crosscut sled has quite some functionalities that you must know:
The crosscut sled makes safe and repeatable crosscuts on a table saw.
Crosscut sleds are also renowned for their accuracy and are very helpful in making complex cuts.
With a 90-degree position design, it also possesses zero-clearance kerf.
They are also very versatile in adding accessories like stomps and clamps to improve functionality.
Speed is one of the finest attributes of the table saw. The speed allows the crosscut sled to cut through multiple parts easily.
Tablesaw crosscut sleds also come with a single or double miter track design for improved accuracy.

crosscut sled
Section 3: Why do we need the table saw crosscut sled?
3.1 There is no friction between the crosscut sled and the table saw.
Friction is a major concern whenever you carry out activities that involve motion. Likewise, for the table crosscut sled, friction affects its motion.
This frictional concern occurs because they are mostly flat as you cut your ply or hardwood. This positioning, along with the movement from the workpiece against the blade, causes friction.
Your grip on the workpiece must be firm to get an accurate cut. This step can prove to be trickier at times when you have to cut slippery materials.
In a nutshell, as your workpiece gets larger or more complex, they increase friction. Some woodworkers prefer miter gauges at such times, but the crosscut sled can be more effective.
Miter gauges may not be effective in cutting materials of such sizes. The crosscut sled’s design makes for a larger base that prevents contact of the workpiece with the saw table.
The absence of this contact makes the crosscut sled a much better option for reducing friction.
3.2 Crosscut sled fences can prevent hurting.
Due to the increasing sizes of materials and complexity, the miter gauge fails to meet accuracy and speed. Using the miter gauge will leave you open to accidents from the blade.
For this reason, the crosscut sled edges the miter gauge with its design configuration. This configuration includes accessories that improve its safety worthiness.
A crosscut sled is particularly useful in preventing injuries or causing fatalities. The crosscut sled’s tailgate provides a clamping surface, thereby preventing accidents.
3.3 Table saw crosscut sled can make repeat cutting:
The crosscut sled device is your best option if you are a woodworker. This device allows you to carry out repeated cutting during woodworking.
With its adjustable stop feature, the table saw crosscut sled is a perfect tool for repeat cutting.
All you need to do is to input the parameters of the sled that mark the dimensions you need. The sled operates more like a basic control system.
Some sleds, however, don’t come with this feature. You can easily attach a scrap block to the fence, and you are good to go with the feature.
3.4 Crosscut sled can accurately cut at an angle.
The crosscut sled is a gem for making cuts at impossible angles. With its zero-clearance feature, the sled combines accuracy and acute functionality.
Section 4: How to build a crosscut sled for your table saw?
4.1 Structure
The design and structure of this sled restrict the number of resources you have available. In addition to the design is the factor that allows you to borrow concepts from earlier and other manufacturers.
Invariably, you are not building from scratch. It is just a combination of different techniques and methods of building a crosscut sled.
4.2 Tools and Supplies
Like most DIY projects, you will need to know the tools to help make your sled. The crosscut sled for the table saw is precision equipment, requiring you to use precision tools. Below are the major tools that you will need to create your crosscut sled:
- Tri-Square
- Drill Bit
- Countersink Bit
- Calipers
- Miter Saw Stand
- Plywood
- Hardwood scrap (straight)
- Earmuffs
- Wood glue
- Feeler Gauges
- Router Bit Set
- Kreg Mini Track
As a side note, you must calibrate your table saw before making any cuts to prevent errors in cutting dimensions.
Tri-square
4.3 Gather materials and cut the pieces
Get yourself a ½” plywood, then mark and cut a 36 inches width along with a 26 inches depth dimension. This dimensioning will make for a suitable table saw sled base.
For creating your fences, use a double stack of ¾” plywood. You can use offcut plywood for this purpose. You should create strips with 37 inches and 23 inches for the back and front fence, respectively.
Glue your strips together to make for a compact fence that is very straight.
Finally, let the glue dry for 8-10 hours before cleaning up the faces with a jointer.
Cutting pieces
4.4 Cut and assemble the runners and the base
- When assembling the runners and the blade, cut your back fence square. After this, you mark your workpiece using a table saw sled base.
- You can cover all exposed edges using a round rover. Then dimension the plywood to make cuts at necessary points.
- Cut your runners using maple wood according to your dimensions for width.
- Adjust the fence to ⅜”, flip your runners and run them through.
- Drill countersunk holes in each runner.
- Next, use the miter slots to position the runners.
- Create slots on your plywood and put two washers along with the slot
- Drop in the runners to move them up from the table surface.
- Secure your runners to the base with permanent screws
- Cut your runners in correspondence to the length of your sled base.
- Finally, give the runners a trial test.
4.5 Add the stiffener and square the fence.
- Before setting up your fences, make sure to add stiffeners at the respective table saw sled ends.
- Next is to make marks on the sled on your router table. These marks will indicate the track length from beginning to end on both sides of the table.
- Mark the width of the cut
- Make a plunge cut on the backside.
- Move your router fence back to allow for maximum width groove.
- Use a chisel for each slot to give it a polished clean look.
4.6 Test the fence for square
- Smoothen your track edges to keep it from catching on anything, then test.
- Put your front fence to hold the sled after cutting.
- Adjust your fence to the end of the sled the drill in with 1-½” screws.
- Raise your blade to cut through from the fence till you get to about 3 inches to the back fence.
- Drill your back fence edge with a countersink bit
- Clamp the fence firmly and square with a chisel.
4.7 Add stop blocks
- Cut a small scrap block and spline, then adjust with sandpaper to fit your sled track. The stop block is a basic block design that acts as a safety measure. The block has a spline to keep the block from rotating with the blade when you lock down the crosscut sled.
- Position your block to about ⅛” to create an allowance for sawdust and minor kickbacks. Subsequently, attach the stop block to the table saw crosscut sled.
- Cut two other sled blocks of sizes 4×3 inches.
- Glue them together and around sled edges.
Create First Cut Series
- Adjust your fence using the popular 5-cut method series.
- Firstly, assign numbers to a fresh 18*18 plywood on all sides.
- Create a strip from each side, with the first strip having a higher dimension.
- Measure both sides of the strip using a caliper.
- Secure all countersunk hole locations to increase rigidity.
4.8 Check accuracy (5-cut Method)
- Repeat your 5-cut method process to take the error percentage.
- Your error should reduce drastically with up to 80% error reduction.
- Clamp a level to your fence for rigidity, then screw the fence in place.
- You can also create further assurance by securing all countersunk hole locations with omission to the first hole.
Section 5: Can I make a table saw sled for 45-degree miter cuts?
5.1 Magic miter sled
The Magic Miter is a woodworker’s go-to tool to measure and cut the ideal markings on your workpiece. Magic miters prove to be integral equipment for handling the versatility that comes with different projects.
5.2 How it works
Using the magic miter, you begin by placing a measuring tool at the points you want to measure. Subsequently, changing the different sides’ miter would be best to lay the level against the wall or plane.
Place the Magic Miter in line with the measuring tool. Change the Magic Miter arms by pushing the middle support forward or reverse.
Continue pushing this support until the arms sit at a similar point as the measuring tool’s point.
Press the point measuring tool down onto the Magic Miter and lock it into a spot to set the point. Add the wood (or other material) you wish to cut into the Magic Miter.
Next, supplement the material on the left arm of the Magic Miter. This procedure does cut a point facing left or right.
Next, add the sharp edge to the Magic Mitre’s middle groove before working on the wood. Hold the wood set up with your non-cutting hand.
Saw the wood until it was carved entirely through before removing it from the Magic Miter. Press the point estimating device down onto the Magic Miter and lock it into a spot to set the point.
Supplement the material on the Magic Miter’s left arm. It allows you to cut a point facing the left or the correct arm to cut an angle.
5.3 How to build a table saw sled for 45-degree miter cuts?
The first step to making a 45-degree miter cut is to attach your runners. To do this attachment, you will tape the top of the runner on both sides. Next is to align your fence to the base with your runners.
Following that, you must attach your sled base to the tape and check to see if it runs smoothly. Then drill holes through your runners into the base and create tap threads into those holes.
Subsequently, fasten with a countersink drill bit. One of the simple tasks during this construction is attaching the fence. All you have to do is place it on the sled, so it flushes with the edge.
Next, you must carefully slide the fence over the fence and take the biggest square. Once you are sure you have taken the biggest square, set it. After setting the square, all that remains is to screw the screws in the corners.
Conclusion
Crosscutting is popular among professionals, skilled users, and unskilled operators. Making a crosscut sled can be tricky, especially if it is a DIY sled.
This article outlays a systematic approach to making your table saw crosscut sled. In conclusion, therefore, as you continue to look out for helpful tips to help make your table saw crosscut sled, look no further.
NCCuttingtools has got you covered. We have the best products and professionals to meet your table saw needs. Contact us today.
