
Having a knife nearby can be crucial in many situations. Whether you are in the kitchen preparing food, working on DIY projects, or trying to get by in the wild, it is an essential utility.
A handle is a crucial part of any knife; therefore, it ensures a comfortable grip and long-term use.
Moreover, if you would like to learn how to make a knife handle? It is vital to pick the right handle material depending on what you expect from a knife.
That is why it is best to design a homemade handle that will fit your expectations.
Table of Contents
- 1. Knife Handle Materials – Which One Should You Choose?
- 2. What Do We Need to Prepare Before Making Knife Handles?
- 3. How to Make a Knife Handle
- 4. Making a Stag Knife Handle
- 5. Making G-10 Knife Handle
- 6. How to Replace the Wooden Knife Handle
- Summary

1. Knife Handle Materials – Which One Should You Choose?
You can choose between a long list of available materials, both a blessing and a curse.
The main material categories include:
- Natural
- Synthetics
- Metals
Here are some homemade knife handle ideas for the materials to choose for your project!
Natural Materials
These come from natural sources and include:
- Wood – is the most frequent choice for knife handles. It is an affordable material that is easy to find. Wood is available in many varieties to ensure it suits your expectations.
- The grip is also comfortable and resistant to slipping. However, wood is porous, and the grip might lose stability over time.
- Leather – genuine leather doesn’t have to be expensive, and it will give a traditional look to your knife. Therefore, if you are a hunter, you might like a leather knife.
- However, this is not a durable material, and you might need to replace the handle often.
- Bone – these are the classic handle options, and the bone can come from different animals. That includes buffalo, cow, and sheep, elk, deer, etc. The problem is bones can crack with heavy-duty use, and the grip might be slippery.
Synthetic Materials
These include human-made materials, and here are the smartest choices:
- Carbon fiber – although it is expensive, it is famous for being extremely durable. Also, carbon fiber is lightweight; moreover, it won’t be heavy to bring it with you. The only thing to ensure is to avoid sharp impacts since the material is brittle.
- G-10 – we get this from a fiberglass laminate called Garolite. It doesn’t look attractive, but it is incredibly durable and tough. You will often find textured handles for an improved grip. That makes it versatile and suitable for indoor and outdoor use.
- FRN – stands short for fiberglass reinforced nylon, and it first appeared in the US market. It is incredibly durable and also affordable. However, FRN doesn’t have a grip as comfortable as with G-10. The affordability ensures there is a variety of options available for different uses.
Metal Materials
You can pick between the following:
- Stainless steel – as a metal, it is resistant to corrosion, which makes it durable. Despite that, stainless steel isn’t the hardest material out there, which is why it’s not great for heavy-duty knives. However, most common users will find it affordable and fits their expectations.
- Aluminum – a light material with impressive corrosion resistance. It will last for a long time, but it is vital to have a proper texture. You can use it indoors and outdoors, but make sure to avoid cold weather since it can be chilly to hold.
- Titanium –is an extremely strong material that provides a comfortable grip. It is also light, but it’s prone to scratching. The good news is that titanium is suitable for cold weather since it won’t be cold to keep in your hands.
2. What Do We Need to Prepare Before Making Knife Handles?
Preparation is the key to a successful project, and that applies to making knife handles. Therefore, you will need certain DIY skills to perform all the steps well.
That includes basic woodworking and metalworking skills. You might need the paint booth to handle the epoxy section of our guide.
The first thing to secure is the materials to use during the project. Here is what to acquire:
- Blade – the blade should fit your size requirements.
- Scales – check out the section on materials to learn more about which to pick.
- Pins – if necessary, pick between solid, mosaic, or those with rivets. The pin should fit the blade optimally.
- Epoxy, masking tape, and sandpaper – you will need these as additional materials.
As for the machines, here is what you will use:
3. How to Make a Knife Handle

Caption: Various knife handles
You are now familiar with the different materials and preparation required to make a DIY knife handle. It’s time to describe the process step by step, so there need to complete the project successfully.
Here are some tips on choosing the right material:
- Wood – the most versatile material suitable for both folding and heavy-duty blades. You can check videos on how to make a walnut and cherry knife handle, too.
- Bone – is an excellent choice if you want a stylish and durable knife.
- Stag – it utilizes deer antlers, so it’s natural, and it’s also unique.
- Aluminum – go with this choice if you want a lightweight blade. A textured handle will reduce the risk of it slipping from your hand.
- Stainless steel – it is corrosion-resistant, and you often find it mixes with rubber to enhance grip.
- G-10 – a fine material that is both strong and lightweight.
We will discuss several most popular materials in this article, and our main guide will focus on wood knife handles.
Before you begin, our suggestion is to get rid of any distractions. Make sure that you have at least a couple of hours to focus on this project. Once you master knife handle making, you will enjoy crafting it and using your knives!
3.1. Preparing Materials and Cutting Handle Material to Size

Caption: Knife handle closeup
In the previous section, we mentioned the materials and tools you need to prepare.
If you have the items ready, place them on a flat surface. Make sure to arrange them properly so that you can easily access any item you need.
Here is what you need to do within this step:
- Grab some masking tape and wrap the sharp portion of the blade. That will ensure you don’t cut yourself while making a knife handle.
- The next thing is grabbing your handle scales and cutting them to the desired size. You want them to be a square, but leave up to an inch of additional material to have wiggle room.
- Use a pencil or any other marking option to mark the blade’s edges on the scales. Feel free to place the knife and then mark around it.
- Next, activate your band saw to make a vertical cut. It is vital to leave up to half of an inch of additional room. Therefore, you will use the sanding process to achieve perfection, and we’ll discuss that later.
3.2. Drilling Pin Holes

Caption: Drill closeup
The crucial thing to know when making a custom knife is that the handles you acquire already have holes. That is how the manufacturers simplify the process for the operator.
It sounds great; in addition, the requirement is to buy a suitable pin.
Therefore, try the pin to see if it fits the hole. If it doesn’t seem perfect, you may need to expand the hole. You can do this with a metal drill press.
Here is how to handle the process:
- Grab the scales and tape them together. Use the tape to place the blade handle over the top.
- Use a pencil to identify where the pins should place. It is vital to be careful and position the holes properly, which affects how to make a handle.
- Pick a drill bit that’s close to the pin size but larger. For example, if your pin is 0.125 inches (1/8), you will use a 0.132 drill (3/16).
- Place the scale into the clamp and start drilling. Always begin from the edges and then move to the holes in the center.
What If Your Knife Has Rivets?
If that happens, your goal is to countersink the hole to achieve the required depth. Therefore, it’s best to take advantage of a caliper to measure the rivet’s head, and that will decide the hole size to drill.
Sanding and shaping the scale section near the blade’s edge is imperative. However, the scales should be symmetric for the knife to look attractive.
3.3. Cutting Your Pins to Size
It is time for the next step to make a knife handle, and it starts by joining the handle. Now, the pin’s outer sides must remain visible. Grab a pencil and head to the long side to mark a 1/8th for cutting.
The next step is cutting the desired pins to the desired length. Remember that it is easy to cut a bit more. However, you can’t make up if you cut too much of the pin. That is why you should be cautious during the process.
3.4. Epoxy the Blade Handle Together
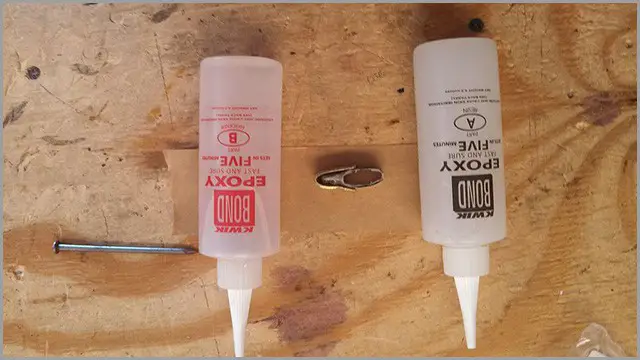
Caption: Epoxy closeup
You will need to use a paint booth for this step. Make sure to take a couple of clamps with you and some paper.
The first thing to do is to place the paper on a clean and flat surface. Position the pins in the holes you prepared. You can assemble and disassemble the knife multiple times. It will help you to learn how to put a handle on a knife quickly. Why is this important?
Once you epoxy the handle, time will be of the essence. Therefore, you will have a short time to do everything right regarding how the coating works.
Are you ready for the actual process? The experts advise getting the epoxy ready and applying a brush on a single handle. Next, connect that to the blade, and then place the pins in their position.
Your idea is to connect the metal and wood. Now, grab the other scale handle and epoxy it. Position the scale over the protruding pins and connect everything.
You can use a clamp to ensure the handle is well-connected. Allow it to rest for 5-10 minutes to tighten. If you notice epoxy on the blade’s outer side, use some tissues to remove it immediately.
You don’t want to risk it drying as it will be almost impossible to remove then.
3.5. Sanding Your Blade Handle into Shape

Caption: Sandpaper closeup
The next step in making a homemade knife handle is to get it into the desired shape. You do that by planning the desired shape first.
Feel free to suit it to your needs – would you like your homemade knife to have a thin or wide handle? Do you want a creative or specific shape?
There is no reason why you shouldn’t start the sending process and decide then. The only thing you need is to use a belt, circle, or spindle sander.
Now, begin on the outer section and sand the material until it’s even with the metal. If you use a circle sander, rotate the handle to achieve the desired form.
It is up to you to decide when to finish the process. However, make sure that the pins don’t stick out – if that happens, do some sanding on them, too.
3.6. Polishing
We are getting close to finishing the how to make a wooden knife handle project. Therefore we still need to do polishing and finishing. Feel free to choose the desired polish, and use sandpaper to act.
The experts recommend the sandpaper to be 400-600 grits. Therefore you can go above that limit if you want a perfectly smooth handle. Now, the process is simple – apply the polish, and use the sander.
Perform this process a couple of times, and apply another polishing layer. Leave it to rest overnight to see how it will look in the morning. If necessary, you can repeat the process.
3.7. Finishing
It’s time for the final touches, so if you have any desire to decorate the handle, now is the right time to do it. You can search for wooden knife handle designs online or get creative yourself.
Either way, don’t forget to remove the tape from the blade so that you can use it freely.
If you feel like you could use video instructions, check out this useful footage on making a knife handle:
4. Making a Stag Knife Handle

Caption: Stag knife
Is the process of making a stag knife different than with other materials? The imperative is to find this natural material since it is quite pricey and not easy to find.
Check out the steps to make the handle:
- Firstly, Prepare the stag by deciding on a position for cutting the horn. The idea is to make it flush, and you can use a hacksaw. Don’t forget to smoothen the edges once you finish using the tool.
- Secondly, Boil the stag in hot water. You can leave it for 60 minutes in the bowl (remove it from the heat). The idea is to soften the material.
- Thirdly, Use a vise to wrap the blade, and don’t forget the masking tape to avoid cutting yourself during the process. Position the stag to put it onto the tang. Leave it overnight to dry.
Then test if the grip is optimal. If it doesn’t feel tight, you can glue the tang and repeat the process.
5. Making G-10 Knife Handle
G-10 is another knife handle material you can use. Here is a short step-by-step guide for making a G-10 knife handle:
- Firstly, use a magic marker to mark the handle at the desired positions. You will need to mark the holes properly.
- Then, grab a hand drill to begin drilling, and you can take advantage of a drill press to even out the holes.
- Use brass bolts as pins and assemble the handle. Use epoxy to glue the scales together.
- In addition, clean the epoxy residue and let it dry. Once you finish that, you can use sanding to achieve the desired shape.
6. How to Replace the Wooden Knife Handle
Would you like to change your wooden knife handle to adjust the unit’s aesthetics, or it seems too old and needs refreshment? Whatever the reason, replacing a handle shouldn’t be too difficult.
The entire process starts by removing the old handle. You can use a hacksaw or a similar tool to do that. Before this, don’t forget to wrap the blade’s sharp end to avoid getting cut in the process.
You can follow how to make knife handles guides provided in this article. It all comes down to using appropriate holes for the pins and connecting the handle properly.
If necessary, you can consider sharpening the blade, too. Once you finish revitalizing the item, the knife will look and perform as well as new.
Summary
If you are making a knife handle, you can choose between various materials. That will ensure the product fits your requirements and preferences.
Although you need to spend some time preparing the tools and materials required, the actual project won’t take a lot of time and effort.
NCcuttingtools can provide various blades and tools at affordable prices. The company has modern equipment and knowledgeable staff capable of complying with customized orders.
If you believe we can help with your next project, don’t hesitate to contact us today!